# Create a pool
## What You Need Before Starting
**📱 Compatible Aptos Wallet**
You'll need a wallet that works with the Aptos blockchain:
* **Petra Wallet** (most popular)
* **Aptos Connect** (Google)
* **Other supported wallets** (shown when you click "Connect Wallet")
**💰 Tokens Ready**
* **Both tokens** you want to pair (e.g., APT + USDC for an APT/USDC pool)
* **APT for gas fees** (small amount needed for transaction costs)
**Example:** To create an APT/USDC pool, you need:
* ✅ APT tokens in your wallet
* ✅ USDC tokens in your wallet
* ✅ Extra APT for gas fees
## Step-by-Step Pool Creation
**Step 1: Connect Your Wallet**
1. Go to Tapp's website
2. Click **"Connect Wallet"**. [Guide](https://github.com/Undercurrent-Technologies/tapp/blob/gitbook/gitbook/user-guides/connect-wallet.md)
3. Select your wallet from the list
4. Approve the connection in your wallet
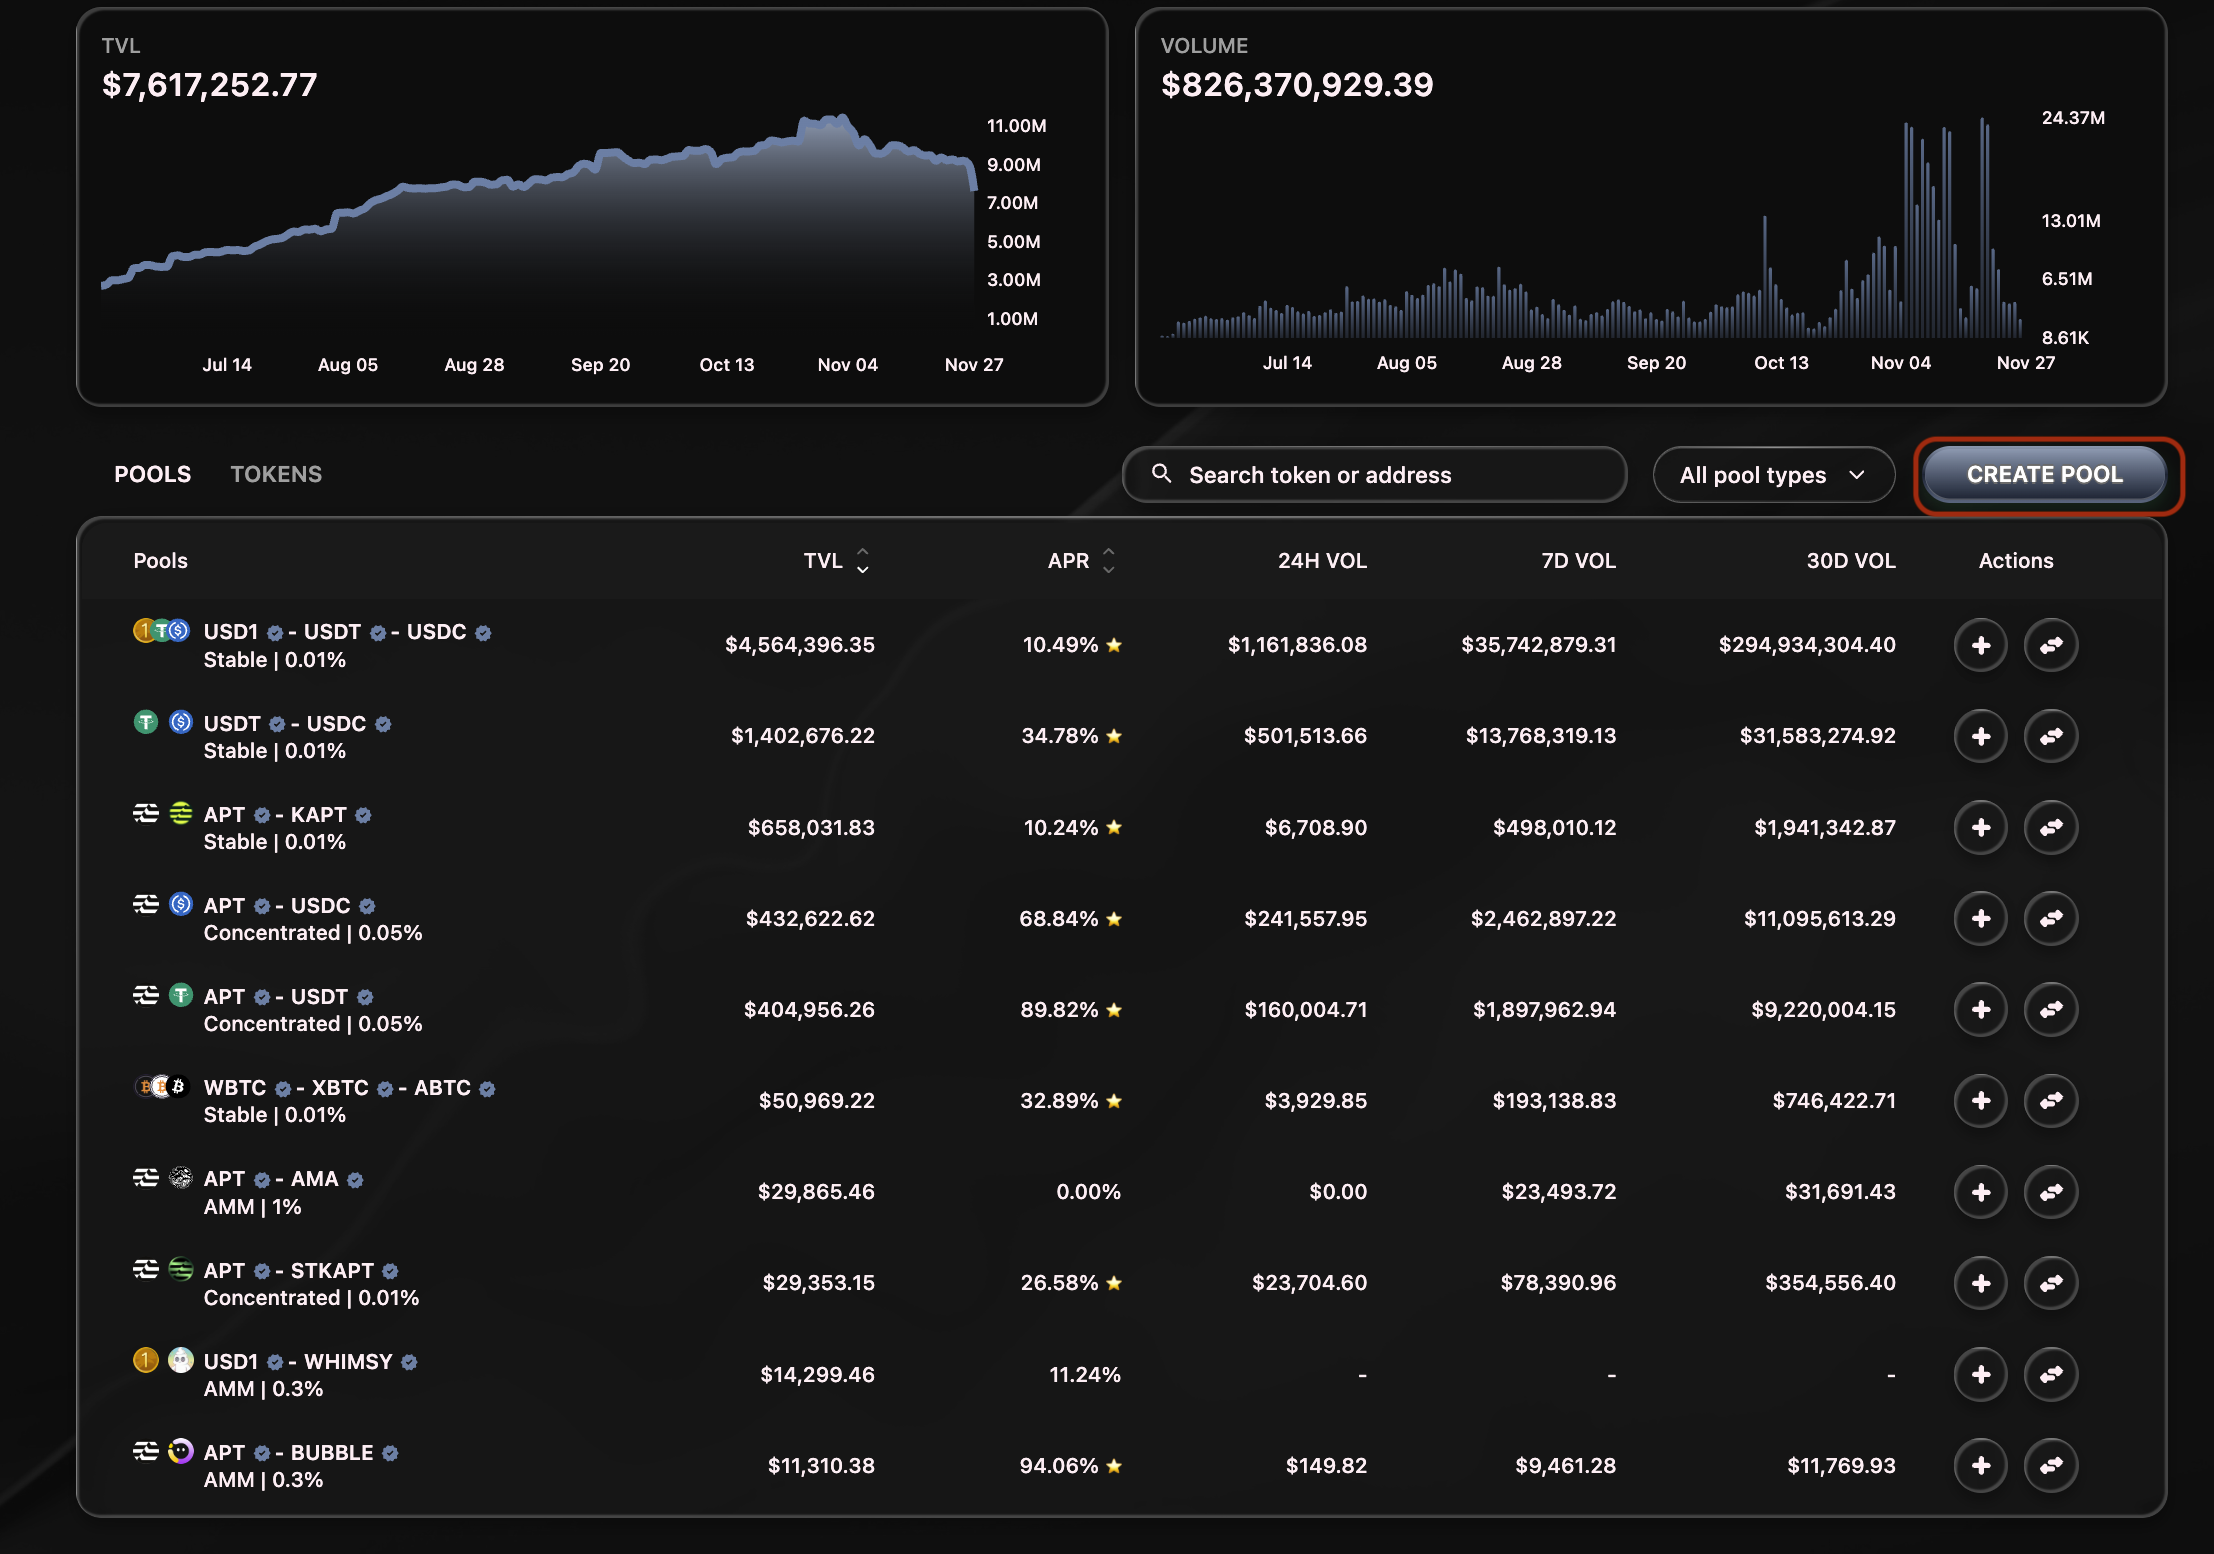
**Step 2: Navigate to Pool Creation**
1. Look for **"Pools"** under **“Earn”** in the main menu
2. Click **"Create Pool"**
3. You'll see the pool creation interface
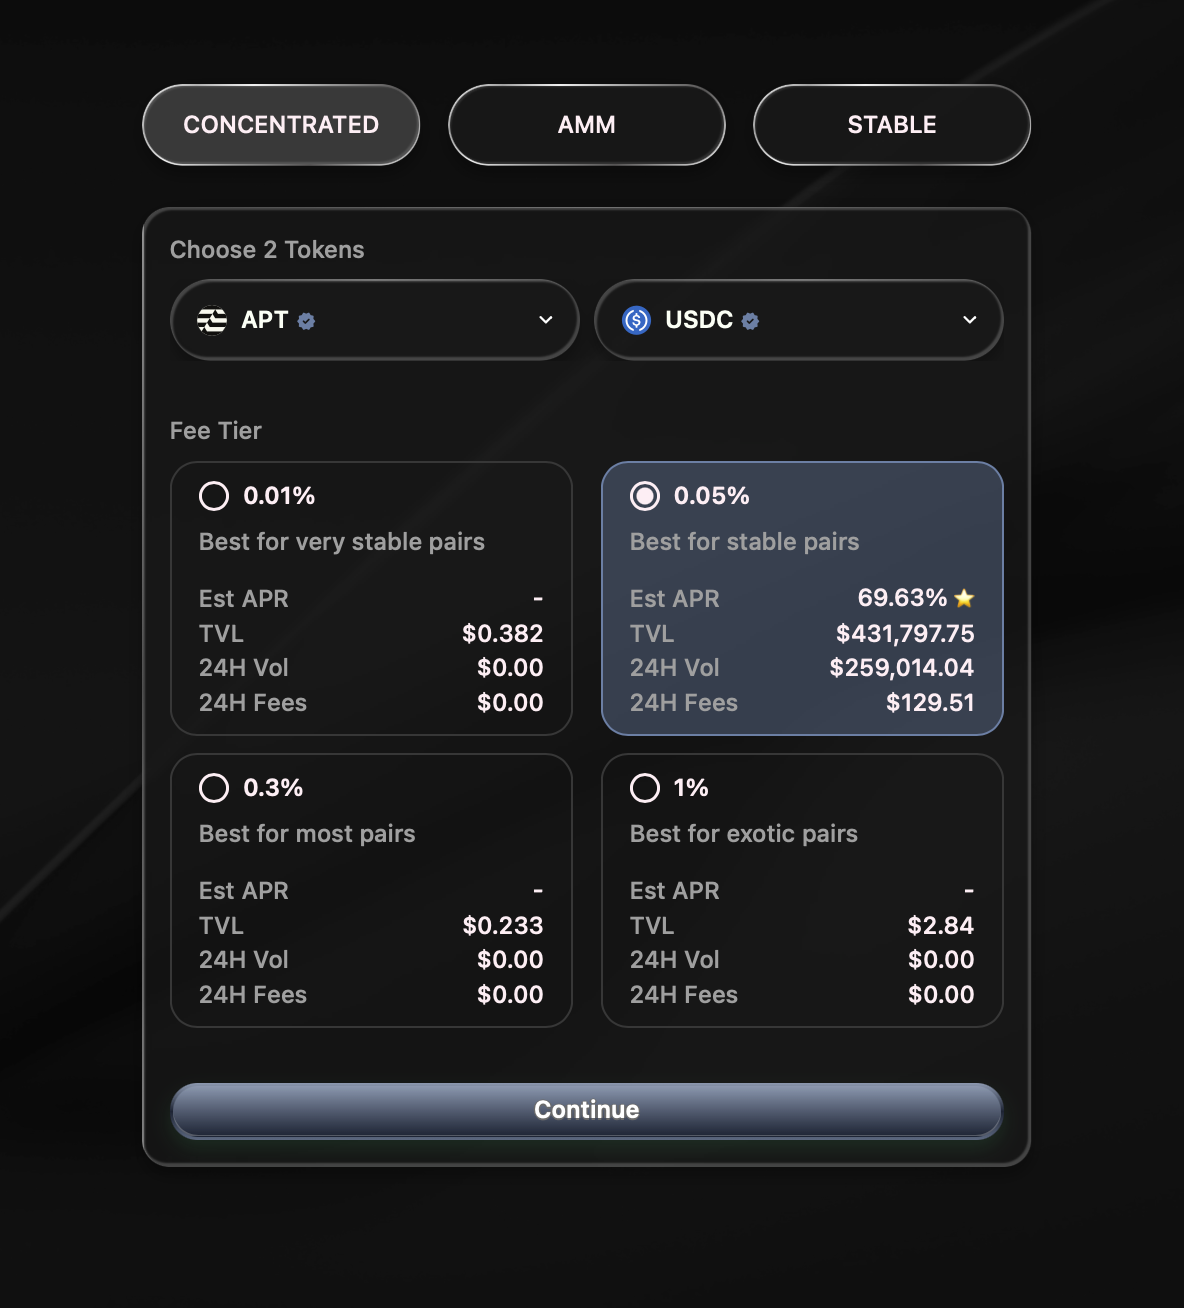
**Step 3: Choose Your Pool Type**
**🔄 Standard Pool (Recommended for Beginners)**
* Simple and reliable
* Your liquidity works at all price levels
* Good for: APT/USDC, major token pairs
* **Best if:** You want set-and-forget liquidity
**🎯 Concentrated Pool (Advanced)**
* Choose specific price ranges
* Higher potential returns
* Requires active management
* **Best if:** You have strong price predictions
**⚖️ Stable Pool (For Similar Assets)**
* Optimized for assets with similar values
* Minimal price impact
* **Best if:** Trading stablecoins (USDC/USDT) or staked assets
**Step 4: Select Your Token Pair**
1. **First Token:** Click dropdown and select (e.g., APT)
2. **Second Token:** Click dropdown and select (e.g., USDC)
3. The platform will show if this pool already exists
**Step 5: Configure Pool Settings**
**For Standard Pools:**
* **Fee Tier:** Choose from available options (usually 0.05%, 0.3%, or 1.0%)
> > - Lower fees = more trading volume
> > - Higher fees = more earnings per trade
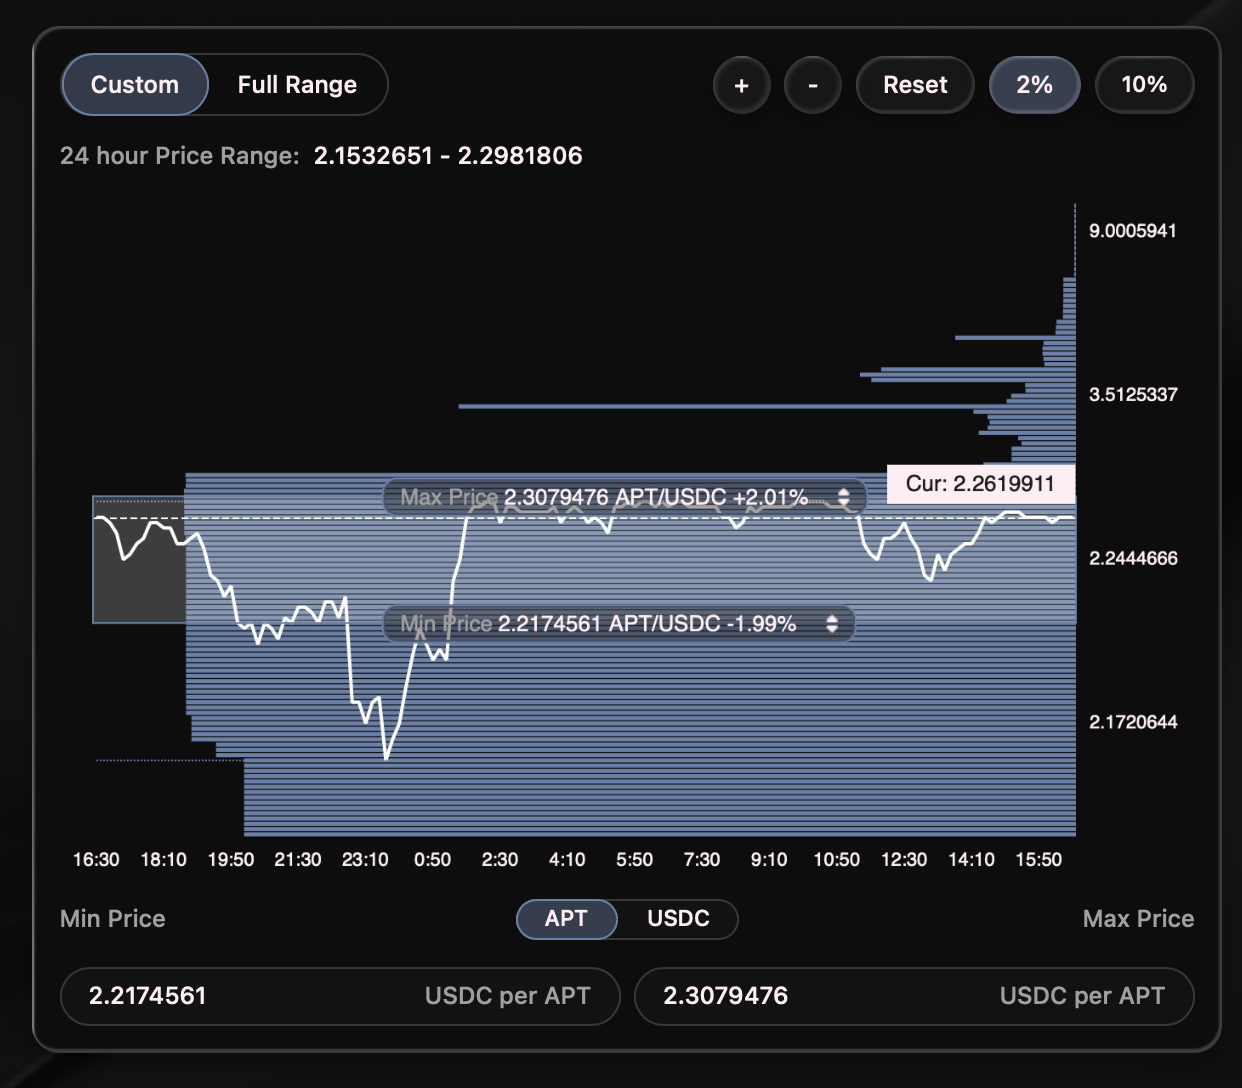
**For Concentrated Pools:**
* **Fee Tier:** Same as above
* **Price Range:** Set minimum and maximum prices
> > - Example: APT currently $5, you might choose $3-$7 range (NFA)
* **Starting Price:** Usually auto-filled with current market price
**For Stable Pools:**
* **Fee Tier:** Usually lower (0.05% or 0.1%)
* **Amplification Factor:** Often preset for optimal performance
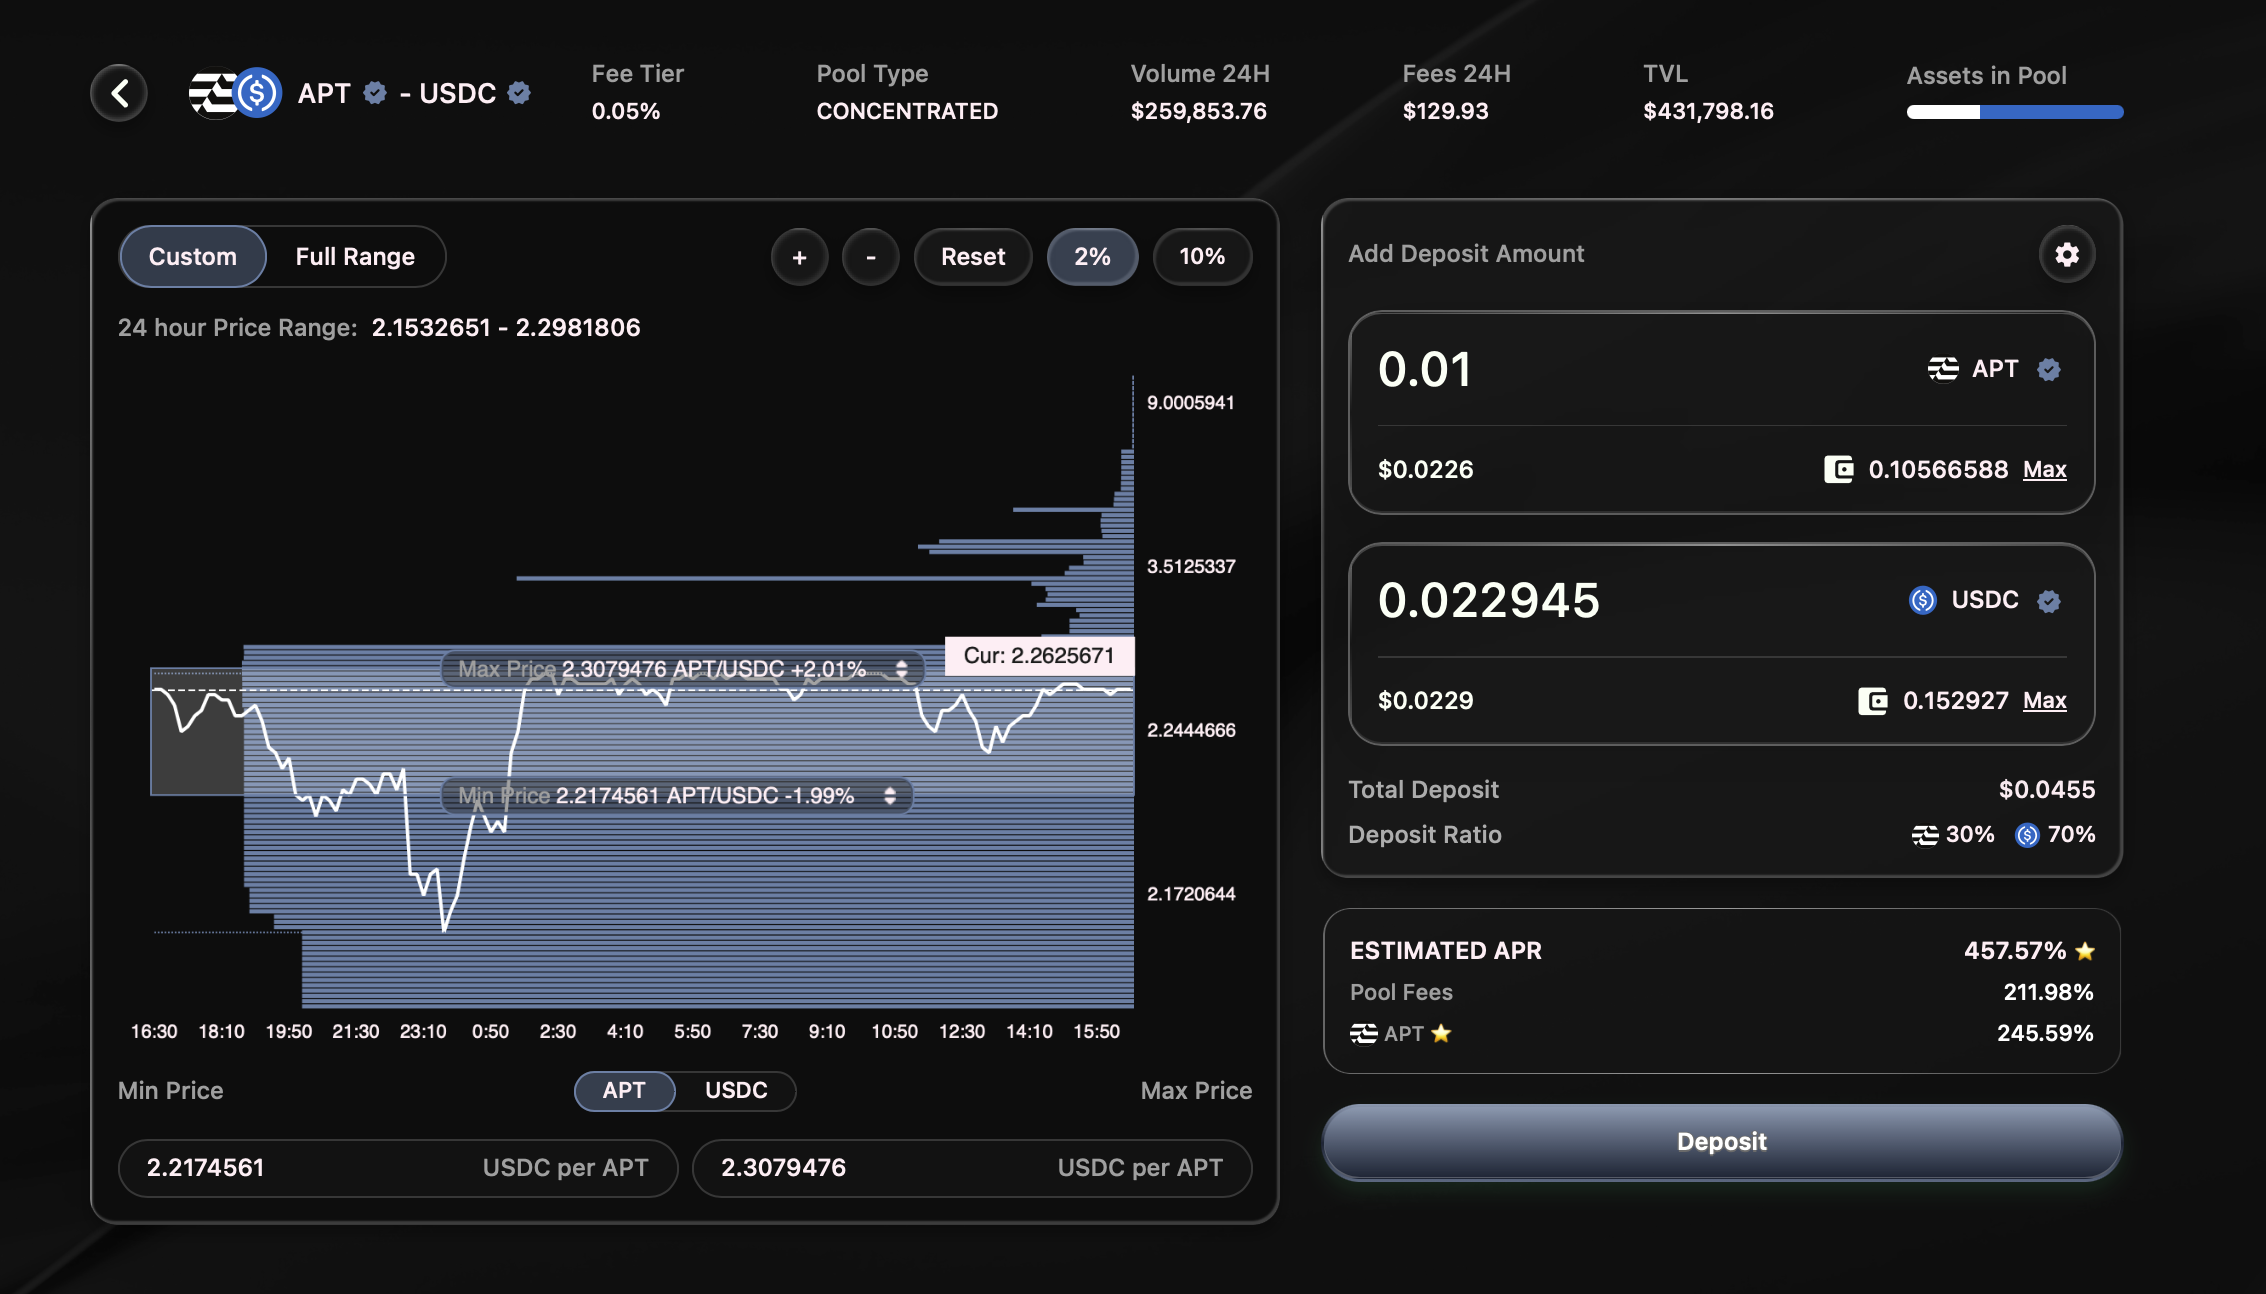
**Step 6: Enter Deposit Amounts**
I’ll use the minimum amount to get point accrual to my LP position \~ 200$ worth of assets
**How Much to Deposit:**
1. Enter amount for first token (e.g., \~15.36 APT)
2. Platform automatically calculates second token amount (e.g., \~104.1 USDC)
3. **Or** enter amount for second token first
**💡 Helpful Tips:**
* Start small for your first pool
* You can always add more liquidity later
* Check that you have enough tokens + gas fees
**Step 7: Review Your Pool**
**Double-Check Everything:**

* ✅ Correct tokens selected
* ✅ Pool type matches your strategy
* ✅ Deposit amounts look right
* ✅ Fee tier is what you want
* ✅ Price range (for concentrated pools) makes sense
**Step 8: Create the Pool**
1. **Approve Token Usage:** Your wallet will ask to approve spending your tokens
> > * Click "Approve" in your wallet
> > * Wait for confirmation
2. **Create Pool:** Click "Create Pool" button
> > * Your wallet will ask for final confirmation
> > * Click "Confirm" in your wallet
> > * Wait for transaction to complete
**🎉 Congratulations!** Your pool is now live and earning fees! You can check your position in the Portfolio tab
## After Creating Your Pool
**📊 Monitor Your Position**
* Check your pool's performance regularly
* Watch for price movements (especially concentrated pools)
* Track fees earned
**💰 Manage Your Liquidity**
* **Add more:** Increase your position anytime
* **Remove some:** Withdraw partial liquidity
* **Adjust range:** For concentrated pools, modify price ranges
**📈 Optimize Performance**
* Rebalance concentrated positions when needed
* Consider different fee tiers based on performance
* Learn from experience and adjust strategy
## Common Questions
**Q: Can I lose money?**
A: Yes, through "impermanent loss" if token prices change significantly. However, you also earn trading fees which can offset this.
**Q: Which pool type should I choose first?**
A: Standard pools are best for beginners - they're simple and always active.
**Q: What if I pick the wrong settings?**
A: You can usually close your position and remove your liquidity and create a new one, though you'll pay gas fees.
**Q: How often should I check my pool?**
A: Standard pools: Weekly or monthly. Concentrated pools: Daily or weekly.
---
# Agent Instructions: Querying This Documentation
If you need additional information that is not directly available in this page, you can query the documentation dynamically by asking a question.
Perform an HTTP GET request on the current page URL with the `ask` query parameter:
```
GET https://tapp-exchange.gitbook.io/tapp-exchange/user-guides/earn/create-pool.md?ask=
```
The question should be specific, self-contained, and written in natural language.
The response will contain a direct answer to the question and relevant excerpts and sources from the documentation.
Use this mechanism when the answer is not explicitly present in the current page, you need clarification or additional context, or you want to retrieve related documentation sections.